
Steps to creating a widget on the CNC mill:
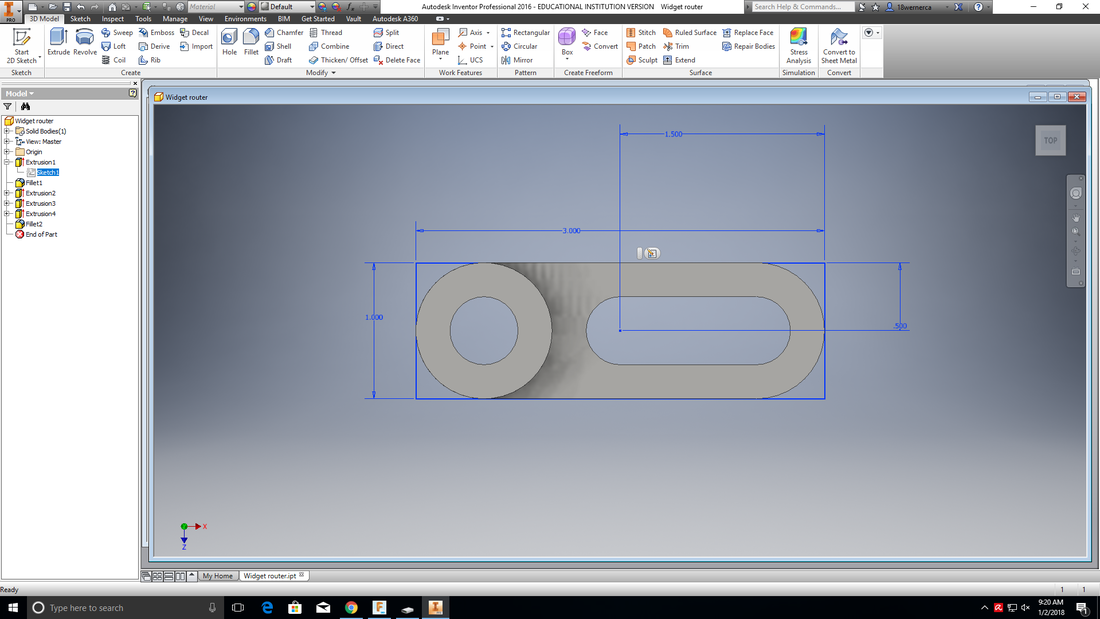
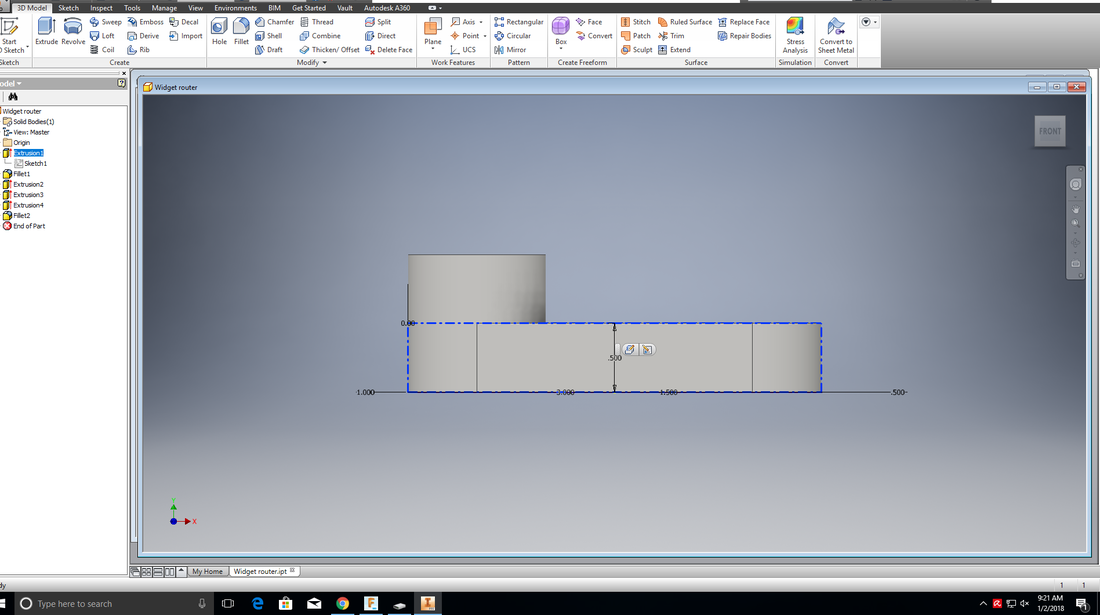
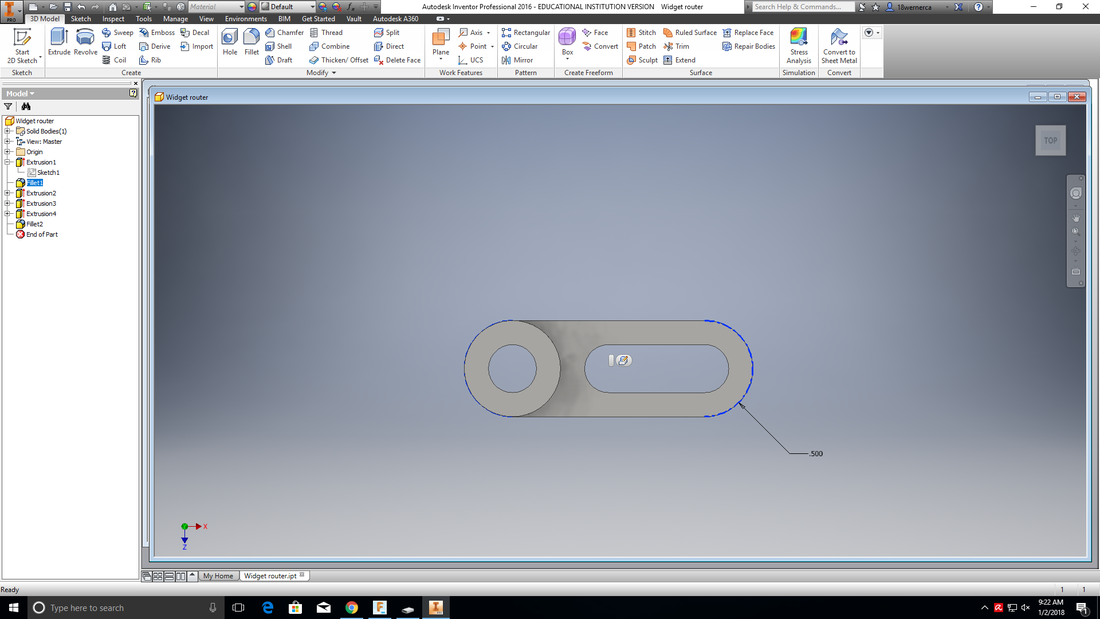
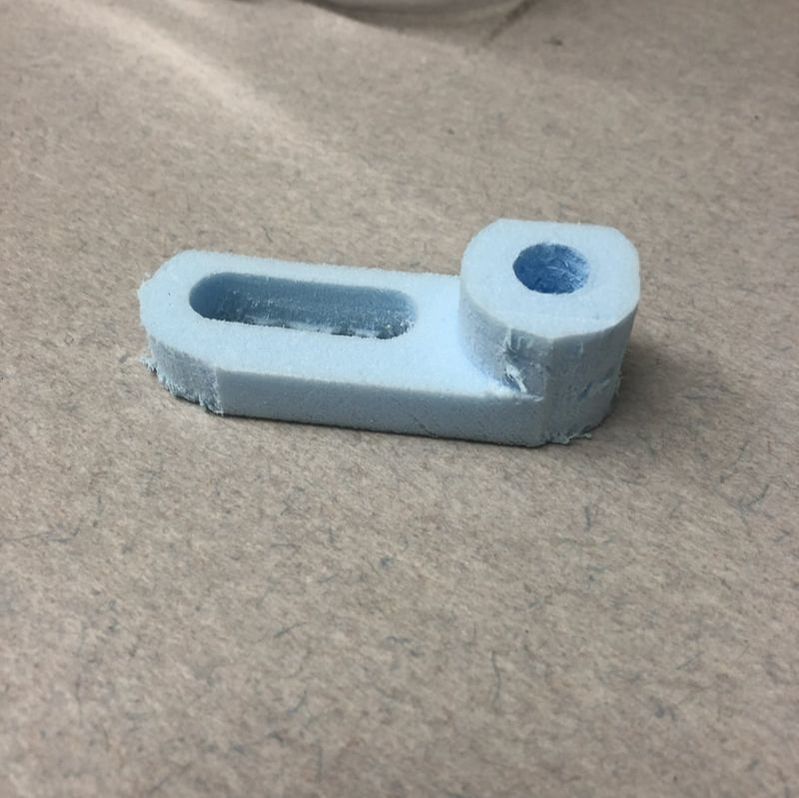
Step 1: You will be using Inventor to create the widget. Start by creating a 1 inch by 3 inch rectangle for the base and extrude it .5 inches. Then fillet each corner .5 inches.
|
|
|
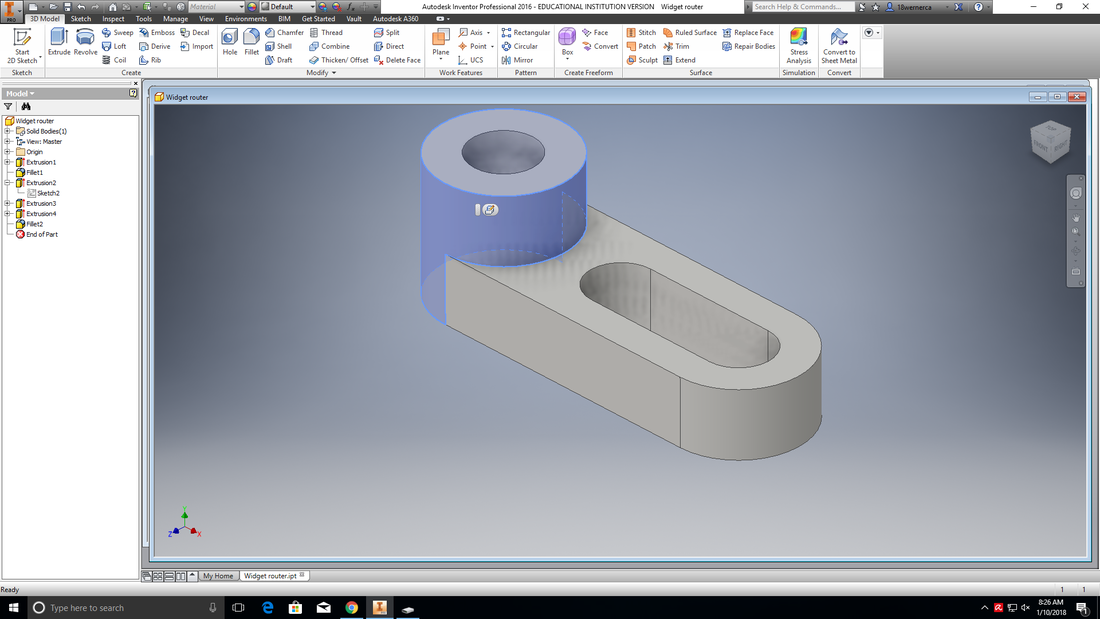
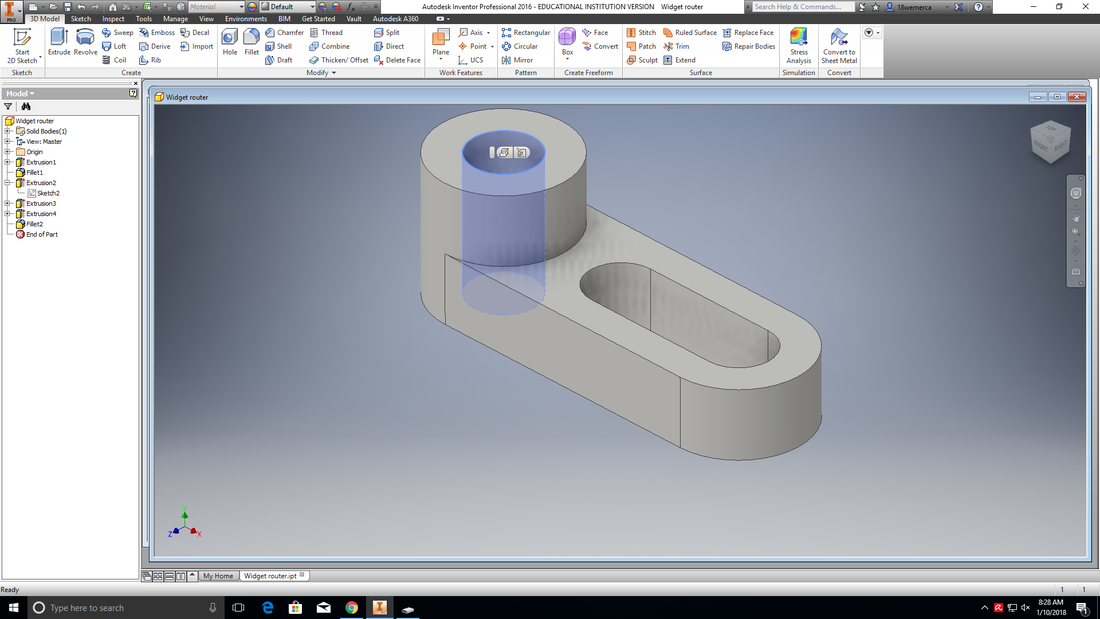
Step 2: Create the top piece by selecting the top face. Create a circle with the radius of .5 inches and extrude it .5 inches outwards. Then create a circle inside that circle with a radius of .25 inches and extrude it 1 inch inwards.
|
|
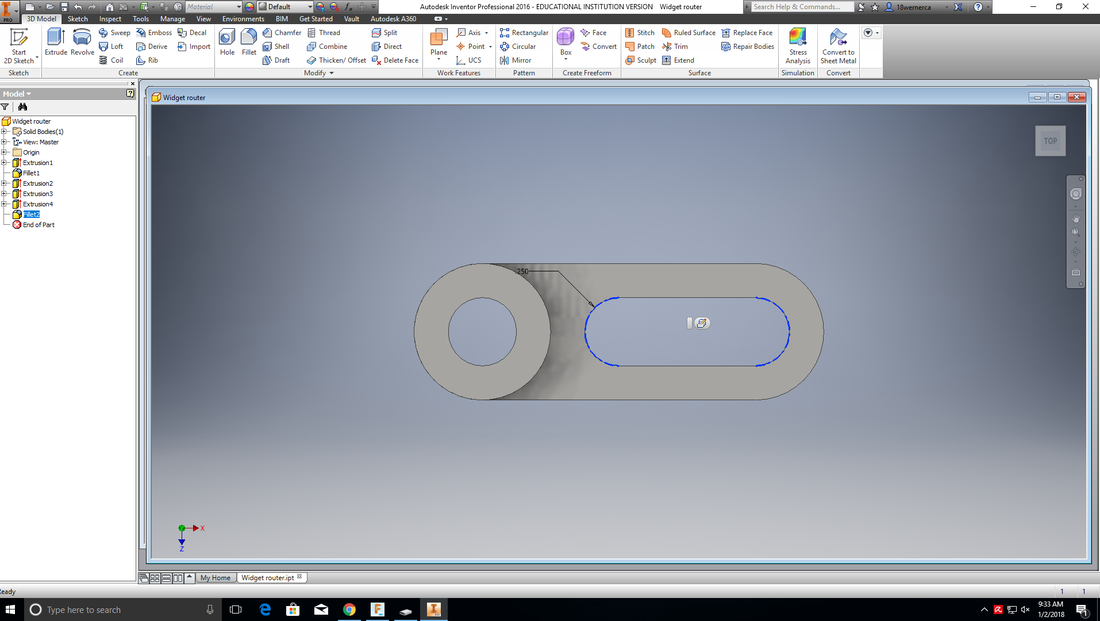
Step 3: Create the hole in the base by selecting the top face and then creating a 1.5 inch by .5 inch rectangle and extrude it .5 inches. Then fillet each corner .25 inches.

|
|
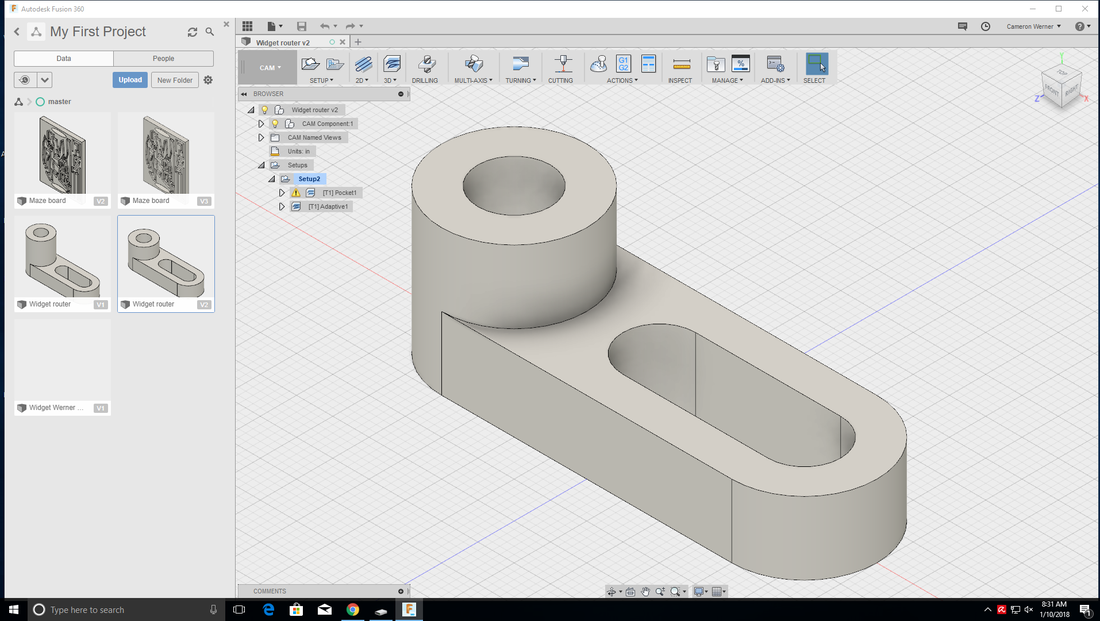
Step 4: Now that the widget is done in Inventor, you can now open it in Fusion 360 to get it ready for the Mill. Make sure you switch the units to inches.
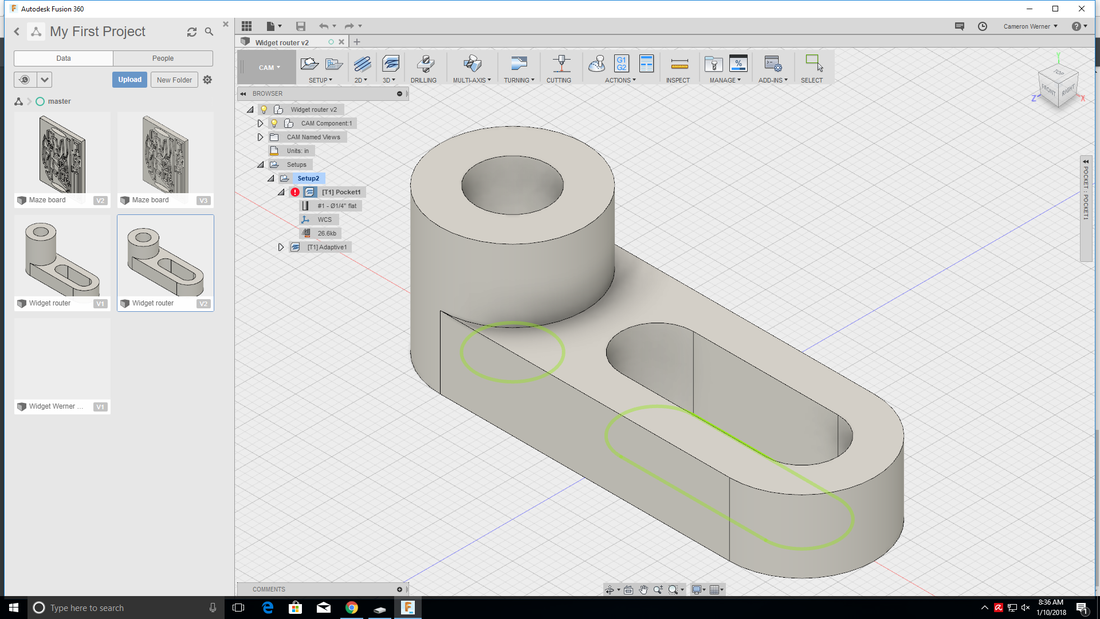
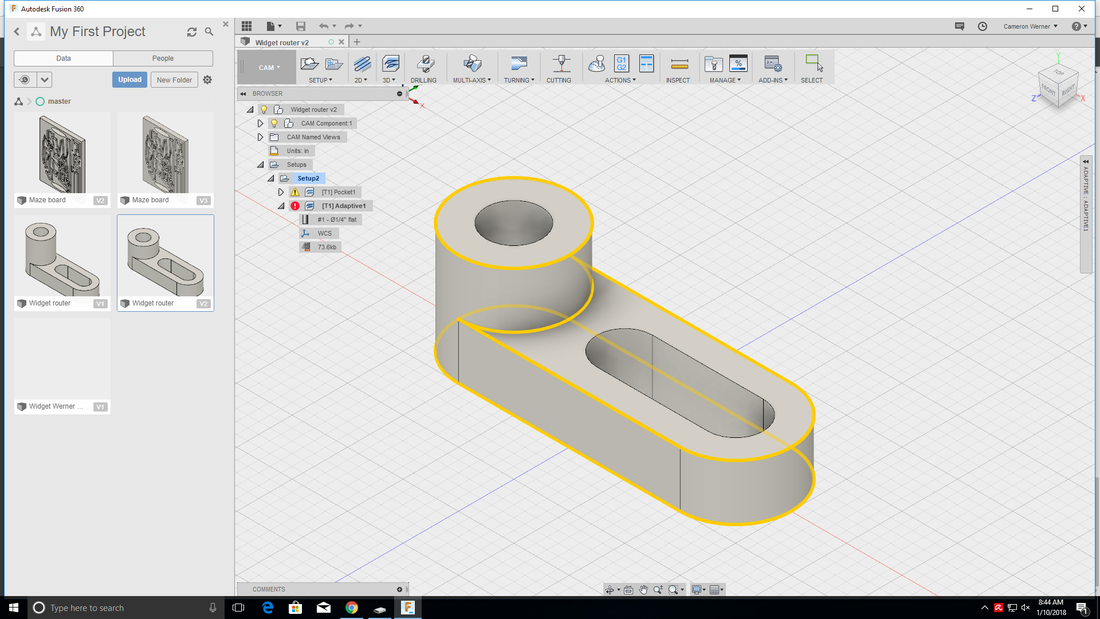
Step 5: Click on the 3D drop down arrow and select "Pocket Clearing." You are going to select the 2 holes of the widget, but make sure you click the hole on the bottom face.
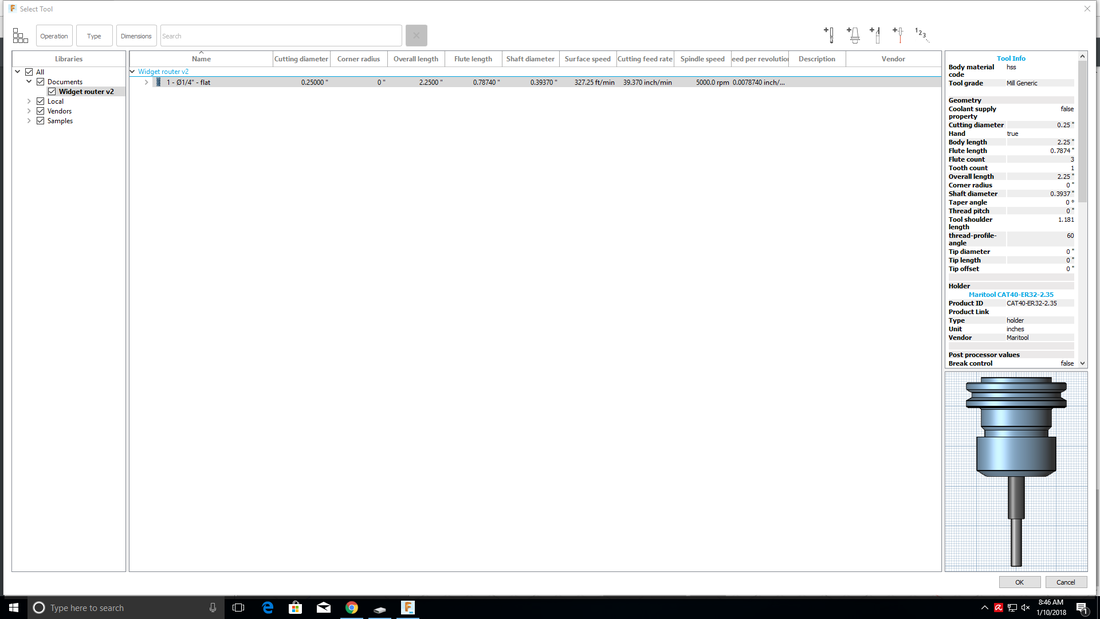
Step 6: The tool we used for this was the 1/4" flat bit, so select this for your tool.

Step 7: Now you need to go to the 3D drop down menu and select the "Adaptive Clearing." make sure to select the outer edges.
Step 8: Select the same 1/4" flat bit tool as before.
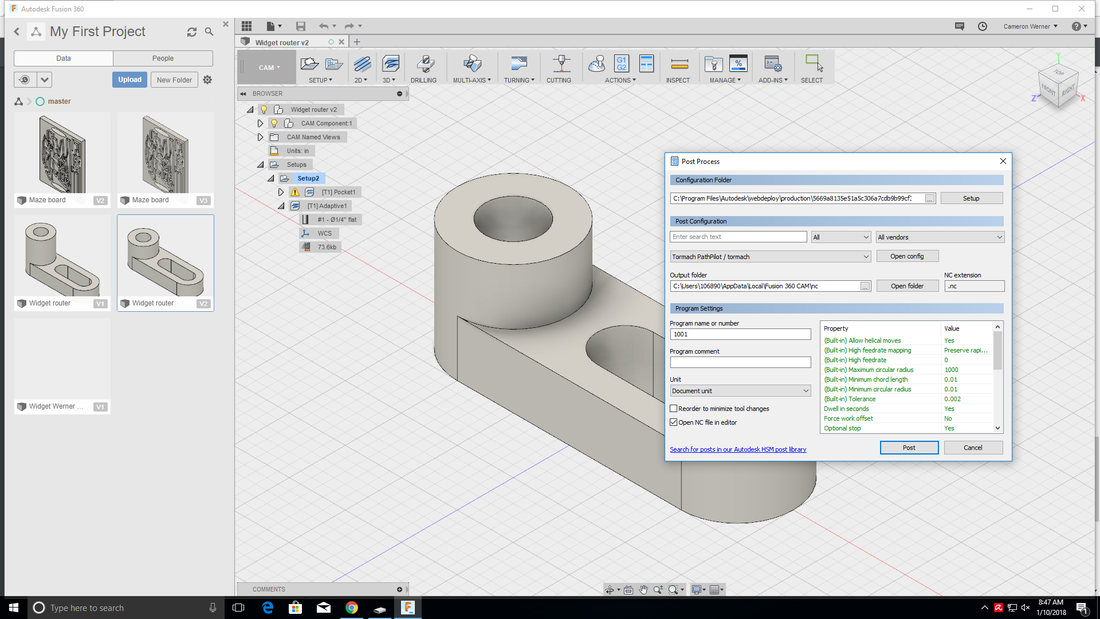
Step 9: Click on the Actions drop down menu and then select "Post Process." Change the Post Configuration to "Tormach Pathpilot."
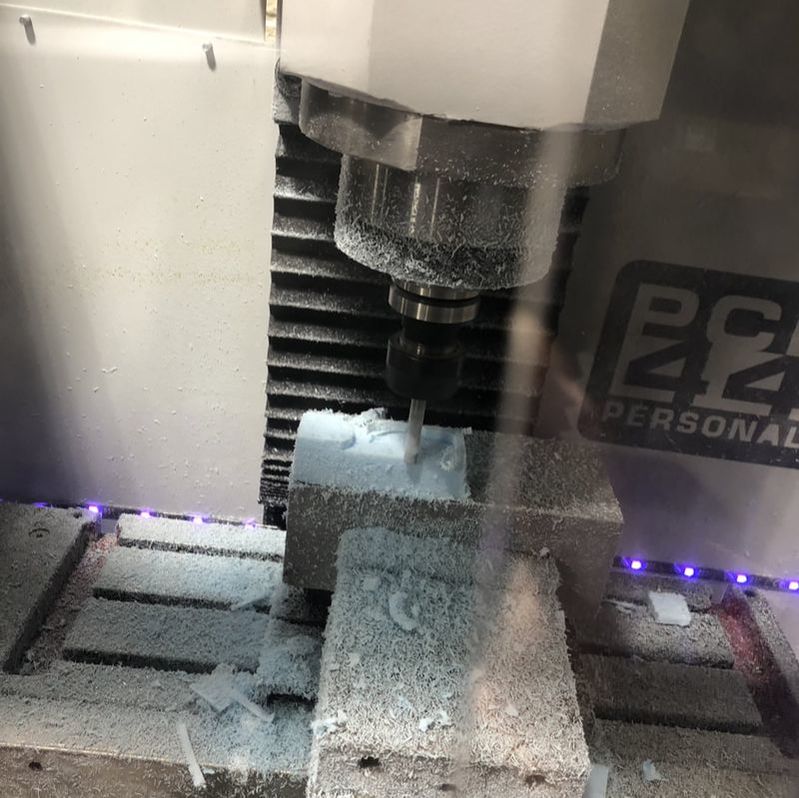
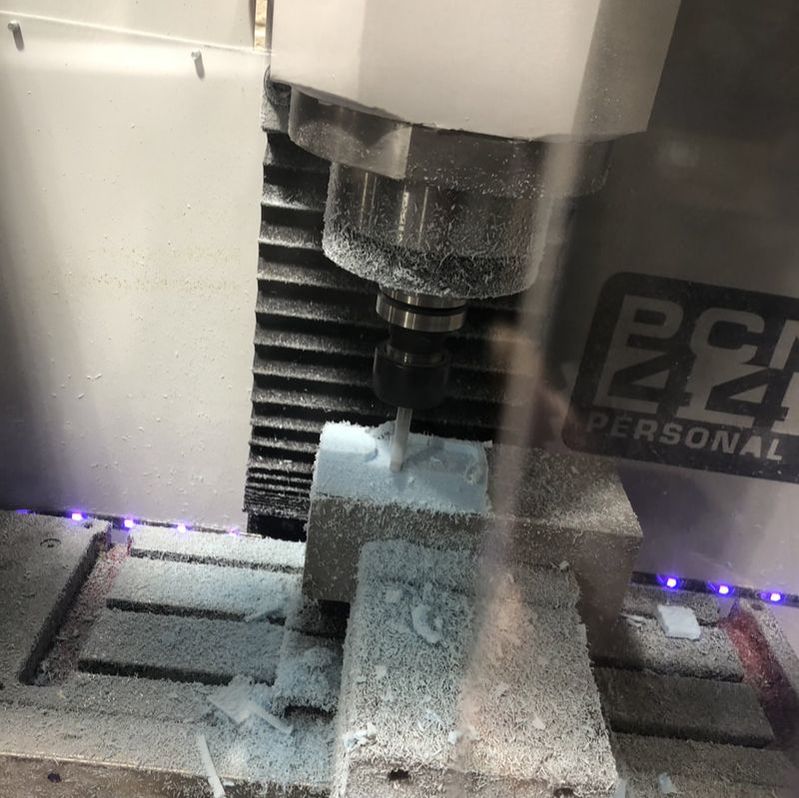
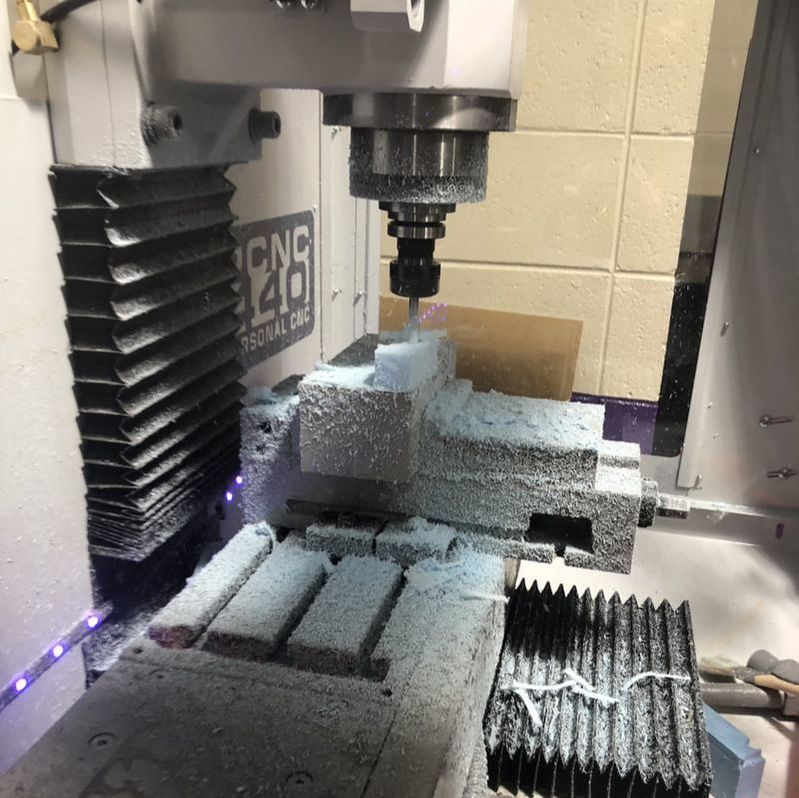
Step 10: Save the G-Code then open it in the CNC Mill computer. Cut your material to 3 inches long and 1 inch wide. Place double sided tape along the bottom of the material and stick it the platform of the Mill. Align the tip of the tool with the corner of your material and then set the axis' to 0. Now you can click "Cycle Start."
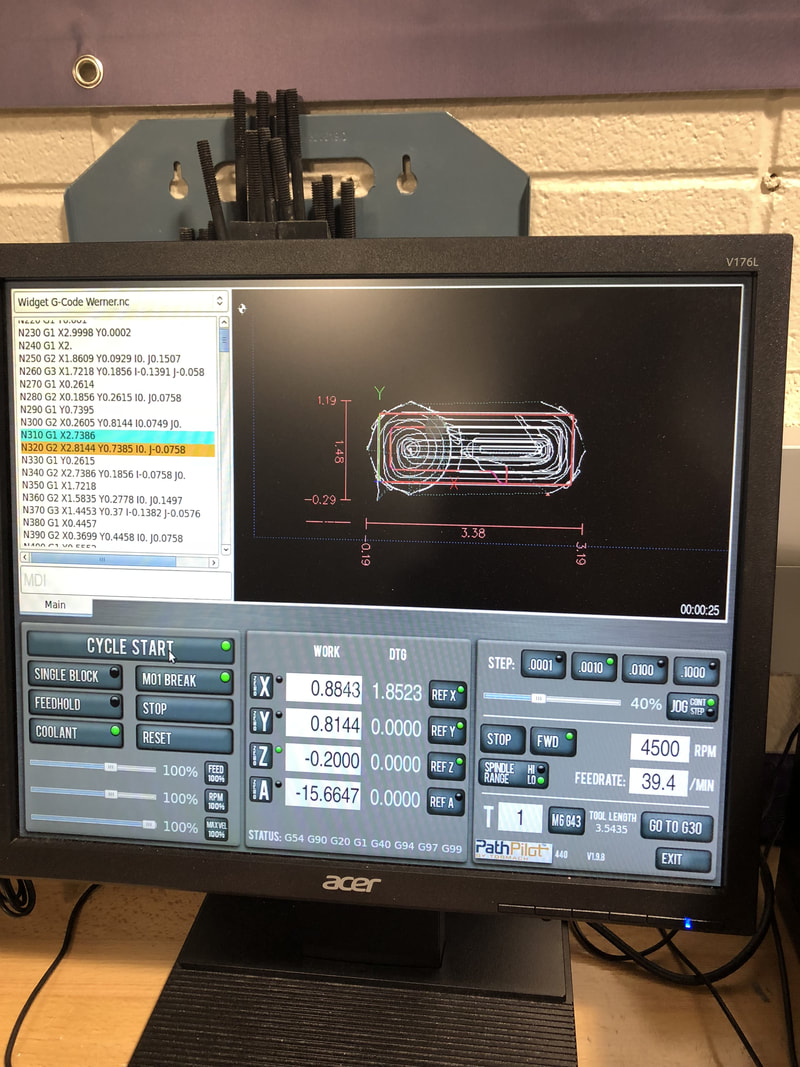
Step 11: Let the machine run and then you're done! P.S. it is extremely important you align the tip of the tool at the corner, above of your material. I didn't align it correctly so my widget didn't turn out how it was supposed to.

|

|
